This is super fast and easy and much healthier than regular alfredo - esp. if you use the low-fat cream of mushroom.
1/2 of 16 oz pkg linguine
1 cup fresh or frozen broccoli florets
2 TB butter
1 lb boneless, skinless chicken breasts cut into bite sized pieces
1 can condensed cream of mushroom soup
1/2 cup milk
1/2 cup parmesan
s/p
1. Prepare linguine according to package directions. Add broccoli during last 4 min. of cooking time. Drain well.
2. Heat butter in 10" skillet over medium high heat. Add chicken and cook until well browned, stirring often.
3. Stir soup, milk, cheese, s/p and linguine & broccoli into skillet. Cook until mixture is hot and bubbling. Serve with additional parmesan cheese.
Source: CampbellsKitchen.com
Thursday, October 29, 2009
Tuesday, October 27, 2009
Chicken Roll-ups
It's good b/c its butter, but its not like you are eating this every week, so give it a try.

Ingredients
1/4 cup all-purpose flour
3/4 cup plain bread crumbs
2 eggs
4 ounces smoked mozzarella, cut into 6 pieces about 2 inches long
6 boneless, skinless, thin-sliced chicken breasts (about 4 ounces each), pounded out to 1/4-inch thickness
3/4 cup (1-1/2 sticks) unsalted butter
1 teaspoon dried parsley
3/4 teaspoon dried thyme
1/4 plus 1/8 teaspoon salt
1/2 cup dry white wine (I used apple juice)
3/4 pound dried angel hair pasta
1/4 cup grated Parmesan cheese
Directions
1. Heat oven to 350°. Coat a 13 x 9 x 2-inch baking dish with nonstick cooking spray.
2. Place flour and bread crumbs in separate shallow plates. Beat eggs in a medium-size bowl.
3. Place a piece of mozzarella on one short end of each chicken breast and roll up tightly. Tuck loose ends in.
4. Coat each chicken roll with flour, dip in the egg and roll in the bread crumbs. Place seam-side down in prepared dish. (I had to use toothpicks to hold it together)
5. Melt butter in a small saucepan and stir in parsley, thyme and 1/4 teaspoon of the salt. Pour mixture over the chicken rolls. Bake at 350° for 15 minutes. Pour wine over the chicken and bake for an additional 25 minutes.
6. Meanwhile, prepare angel hair pasta following package directions. Drain and place in large serving bowl.
7. Remove chicken from baking dish and place on serving platter. Season with remaining 1/8 teaspoon salt. Pour butter-and-wine mixture from baking dish over pasta and toss with Parmesan cheese. Serve immediately.
Source: Family Circle November 2009, page 182
Thursday, October 22, 2009
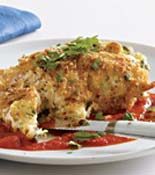
Double-Stuffed Chicken Breasts
 1/2 cup small shell pasta
1/2 cup shredded mozzarella cheese
1/2 cup ricotta cheese
1/2 cup grated parmesan cheese
1/2 cup coarsely chopped flat-leaf parsley
Salt
2 large eggs
2/3 cup breadcrumbs
Four 8- to 10-ounce chicken breasts
3 cups store-bought marinara sauce
Directions:
1. Preheat the oven to 350°. Line a baking sheet with parchment paper. In a pot of boiling, salted water, cook the pasta for 4 minutes; drain and rinse with cold water. Transfer to a bowl and add the mozzarella, ricotta, parmesan and 1/4 cup parsley; season with salt.
2. In a shallow bowl, beat the eggs. Place the breadcrumbs in another shallow bowl.
3.Stuff the pasta-cheese mixture under the skin of each chicken breast. Dip the stuffed chicken breasts in the eggs, roll in the breadcrumbs, then place skin side up on the prepared pan.
4.Bake until an instant-read thermometer inserted in the breast registers 165°, about 50 minutes.
5.Meanwhile, in a saucepan, heat the marinara sauce. Serve each breast on a bed of sauce, topped with 1 tablespoon parsley.
I used skinless chicken. I think next time I would leave out the pasta, didn't really add much since it didn't really taste like anything, just filler.
Source: Every Day with Rachael Ray October 2009 page 110
Tuesday, October 20, 2009
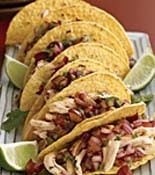
Chicken Tacos with Spicy Grape Salsa
I wasn't sure about this one, but I tried it anyway and even the kids ate it. Justin added hot sauce and we added some sour cream between the chicken and the salsa to hold it all together and give it some extra moisture.


3 cups seedless red grapes (about 1 1/2 pounds), chopped
1 red onion, finely chopped
1 to 2 jalapeño chiles, seeded and finely chopped
1/2 cup chopped cilantro
Juice of 1 lime
Salt and pepper
One 12-count package taco shells
One 2 1/2-pound rotisserie chicken, skin discarded and meat shredded
1 red onion, finely chopped
1 to 2 jalapeño chiles, seeded and finely chopped
1/2 cup chopped cilantro
Juice of 1 lime
Salt and pepper
One 12-count package taco shells
One 2 1/2-pound rotisserie chicken, skin discarded and meat shredded
Directions:
1.Preheat the oven to 350°. In a medium bowl, combine the grapes, onion, jalapeño, cilantro and lime juice. Season with salt and pepper.
1.Preheat the oven to 350°. In a medium bowl, combine the grapes, onion, jalapeño, cilantro and lime juice. Season with salt and pepper.
2.Place the taco shells on a baking sheet and heat in the oven for 3 to 4 minutes. Place the chicken in a medium bowl and microwave at high power until warmed through, about 30 seconds; stir in 1/2 cup grape salsa.
3. Divide the chicken mixture among the 12 taco shells and top with more grape salsa.
Friday, October 16, 2009
Chicken Tips
My little brother, who went to a (real) culinary school and works in a fancy restaurant, gave me an excellent tip when I was complaining about how I hate shredding chicken one day. So that is where this post comes from and I'll get to the tip later...
I wanted to use his tip and save myself some time/effort when its time to make dinner b/c 5:00 is the worst time to be making dinner b/c the kids are whiny and hungry and you're trying to get dinner on the table. It seems like I'm always defrosting chicken and chopping it up last minute or boiling it and tediously shredding it.
So I went to Sam's Club, and bought two 6 lb packages of fresh, boneless, skinless chicken breasts for $1.97/lb which is pretty good. I'll be honest, it did sit in my fridge for 3 days before I got to it, but now that its done I feel so accomplished and domestic and prepared for about 15 dinners!
I trimmed and cubed the chicken from one package and put it in Ziploc freezer bags - 1 lb per bag since most recipes seem to call for 1 lb of chicken. Label it, date it, and put it in the freezer. Even though the package said 6 lbs, I only got five 1 lb bags out of it...so either my scale is off or theirs is. ? Oh well, that's chicken ready to go in the skillet for 5 meals!
While I was doing that, I had the chicken from the other package boiling in some water on the stove. I also trimmed the extra fat off those breasts before throwing them in. Once they were cooked through I took them out of the water with tongs (don't pour the water down the drain!) and let them cool on a plate for about 10 minutes. And here is my brother's tip: Instead of shredding them with a fork or your fingers, which takes FOREVER, put them in your Kitchen Aid with the paddle attachment and turn it on low speed! So much easier! I hate shredding chicken! I wish I had known this a long time ago or been taught it at my (not quite real) culinary school. Anyway, so then I packaged the shredded chicken in freezer bags - 2 cups per bag. And now I have shredded chicken ready to go for another 5 meals!
Those cans and boxes of chicken stock/broth aren't very cheap - so don't throw out the water from boiling your chicken! I supplemented mine with a couple tsp. of chicken bouillion powder, let it cool, then strained it into a pitcher. Once it was cool enough, I measured put 2 cups for each freezer bag and put those in the freezer too. So now I have chicken broth for 5 meals!
Yes, this was a little time consuming, but it will save me time and mess later when the kids are whining and hungry. Flatten out the contents of the bags before freezing them so they will defrost faster (and fit better in your freezer). And if you can find chicken for a really good price, this is a great way to stock up!
Thursday, October 15, 2009
Spaghetti Squash Spaghetti
I thought I posted about this last year, but I guess I didn't b/c I can't find the post! Spaghetti squash is in season this time of year and that means its cheap! And its easy too. And healthier than regular noodles. And if you've never tried it, you should. The hardest part is cutting the squash in half, so be careful and use a good, sharp knife!
Cut your spaghetti squash in half lengthwise. Scrape out the seeds and stringy stuff. Place face-down on a baking sheet and bake at 350 for 30-45 minutes. (I overbaked this time and the squash was more like mush than spaghetti noodles, so watch it) It will be soft and pull apart like spaghetti noodles when its done.
Take it out of the oven and let it cool a little bit, then scrape out the insides with a fork. It should look like spaghetti noodles... Place in a bowl and season with a little s/p.
Serve with your favorite spaghetti sauce - homemade or out of a jar, whatever you like!
I get mine out of a jar, but I brown about a pound of ground beef along with some chopped green peppers, then drain off the fat and stir in the sauce.
Monday, October 12, 2009
Carrot Pumpkin Cheesecake Muffins
 1 package (8 ounces) cream cheese, softened
2 eggs
2 tablespoons sugar
1 tablespoon lemon juice
1 package (14 ounces) pumpkin quick bread and muffin mix (such as Pillsbury)
1 cup shredded carrots
3/4 cup milk
1/2 cup raisins (no thanks, I left these out...)
2 tablespoons vegetable oil
1/2 cup chopped pecans
3 tablespoons butter, softened
1. Heat oven to 350°. Spray a 12-cup muffin pan with nonstick cooking spray.
2. In a medium-size bowl, beat cream cheese, 1 egg, sugar and lemon juice until smooth.
3. Set aside 1/2 cup of muffin mix for topping. Place rest of mix in large bowl. Add remaining egg, carrots, milk, raisins and oil. Stir until well blended.
4. Fill each muffin cup with 1/4 cup of batter. Spoon 1 heaping tablespoon of cream cheese mixture over top of each muffin.
5. In a small bowl, combine reserved muffin mix, pecans and butter. Mix with fork until crumbly. Sprinkle evenly over the cream cheese in each muffin cup.
6. Bake at 350° for 25 minutes. Remove from oven and cool muffins in pan for 15 minutes. Gently lift muffins out of pan and cool completely.
Source: Family Circle June 2009 page 228
Saturday, October 10, 2009
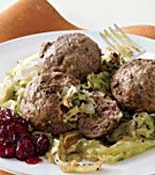
Inside-out Stuffed Cabbage Meatballs
 The original recipe said to stuff some of the cabbage inside the meatballs, but that seemed like an unnecessary hassle, so here's the recipe with that step taken out and modified:
3 tablespoons butter
2 pounds green cabbage, shredded
1 tablespoon maple syrup
1 tablespoon caraway seeds
Salt and pepper
1 1/2 pounds meatloaf mix (ground beef, pork and veal)
1/2 cup breadcrumbs
1 large egg, beaten
1/2 teaspoon ground allspice
One 16-ounce can whole-berry cranberry sauce
1. In a large skillet, melt the butter over medium-high heat. Add the cabbage and 1/4 cup water and cook, stirring frequently, until wilted, about 5 minutes. Stir in the maple syrup and 1 teaspoon caraway seeds; season with salt and pepper. Lower the heat to medium-low, cover and cook, stirring occasionally, until the cabbage is tender, about 5 minutes. Transfer cabbage to a bowl.
2. Meanwhile, in another bowl, combine the meatloaf mix, breadcrumbs, egg, allspice and remaining 2 teaspoons caraway seeds. Form into meatballs, ping-pong ball or golf ball size, and place in skillet you cooked the cabbage in over med-high heat. Brown meatballs on all sides.
3. Add the cabbage back to the skillet; nestle the meatballs in the cabbage. Add 1 cup water to the to the skillet. Bring to a simmer over medium heat, cover and cook, turning the meatballs once, until cooked through, about 15 minutes. Season with salt and pepper. Serve the meatballs on the cabbage, along with the cranberry sauce. (I also served with mashed potatoes)
Source: original recipe from Everyday with Rachael Ray October 2009 page 112
Wednesday, October 7, 2009
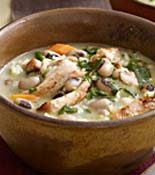
Creamy Chicken and Rice Soup

2 TB extra virgin olive oil
1 lb boneless skinless chicken thighs
s/p
3 carrots, sliced crosswise
1/2 cup long grain rice, rinsed
16 oz pkg frozen black-eyed peas, thawed
32 oz (4 cups) chicken broth
9 oz pkg frozen creamed spinach, thawed
1. In large pot heat the olive oil over med-high heat. Season the chicken with s/p. Add to the pot and cook, stirring, until golden 6-8 minutes; transfer to a plate. Add carrots, rice and beans, scraping up any browned bits, for 1 minute, then stir in chicken broth and 2 cups water. Bring to a simmer until rice and beans are tender, about 20 minutes.
2. Meanwhile, shred the chicken. Add to the soup along with the creamed spinach and cook for 5 minutes; season with s/p. Serve with baguette, rolls, or bread.
Cut calories by using chicken breasts instead of thighs and plain frozen spinach instead of creamed.
Source: Everyday with Rachael Ray October 2009
What I did: I did use chicken breasts and I grilled them on the George Foreman instead of cooking them in the pan and then shredded them. So you can use whatever shredded chicken - however you like to do it, and just start out with the carrots and beans and rice in the pot. It seems like anytime I try to cook it in a pan like that it just gets burned on the outside and still raw in the middle, so for me this was simpler. Justin is not really a fan of soups, but he complimented me on this one. And it's pretty hearty, not too soup-y.
Subscribe to:
Comments (Atom)