I got this recipe is from www.twopeasandtheirpod.com and it seems she got it from food blogs, Rock Recipes and My Baking Addiction. So this must be a popular recipe! And it should be b/c it's really good! The cookies also freeze well if you want to save some for another time.
2 3/4 cups all-purpose flour
1 teaspoon baking soda
1/2 teaspoon baking powder
1/2 teaspoon salt1 cup butter, softened
1 1/2 cups white sugar
1 large egg
1/2 teaspoon vanilla extract
Zest of one large lime
3 tbsp lime juice
½ cup toasted coconut
1/2 cup sugar for rolling cookies
1. Preheat oven to 350 degrees. Line cookie sheets with parchment paper or Silpats.
2. In a small bowl, whisk together flour, baking soda, baking powder and salt. Set aside.
3. Using a mixer, beat together the butter and sugar until smooth and very fluffy. This will take a couple of minutes.
4. Beat in the egg, vanilla extract, lime juice and lime zest. Mix until well combined.
5. Gradually add in the dry ingredients and toasted coconut. Mix until combined, don’t over mix.
6. Roll rounded teaspoonfuls of cookie dough into balls. Put sugar in a small bowl and roll cookie dough balls in the sugar. Place on lined cookie sheets about 1 1/2 inches apart.
7. Bake 8 to 10 minutes or until lightly browned. The cookies will start to crack a little bit.
8. Let stand on cookie sheet two minutes. Move cookies to a cooling rack.
*Note-to toast the coconut-place coconut on lined baking sheet. Bake for 5-8 minutes at 350 degrees. Tossing a couple of times. Remove from oven when coconut is light brown.*
Makes about 3 dozen cookies
Tuesday, July 6, 2010
Thursday, July 1, 2010
Grilled Pineapple & Chicken Quesadillas
Flour tortillas
Fresh pineapple, sliced
2-3 chicken breasts
grated monterrey jack cheese
jalapeno, sliced (seeds & ribs removed if you don't want it spicy)
Cilantro
BBQ sauce
Adjust the ingredients according to how much you want to make & how much of each thing you want in your quesadillas - nothing complicated here.
Grill your pineapple slices and chicken breasts however you like to grill (outdoor, indoor grill pan, etc. I did mine on the George Foreman). A little s/p for the chicken is good & the pineapple doesn't need anything, just put it on the grill & let it get some golden grill marks. You could skewer it if you are afraid of it falling apart or down into the grill.
When the chicken is done, let it rest a couple of minutes then shred it or thinly slice it. Chop the pineapple into smaller, bite size pieces.
Now assemble your quesadillas: chicken, pineapple pieces, cheese. Then pour on some bbq sauce, add some cilantro and some jalapeno. Put the top tortilla on and bake in the oven, or in a skillet, however you usually make a quesadilla. We have a quesadilla maker.
Once the tortilla is browned and cheese melted, let it sit for a minute then cut into wedges (I use a pizza cutter). Serve with sour cream, pico de gallo, whatever you like.
These are so yummy! If you are in a pinch, you could use pineapple tidbits from a can, but drain them well. Also, even after sitting a few minutes these are so hot inside! The pineapples and cheese really hold the heat in, so don't burn your mouth!
Adapted from the Pioneer Woman's recipe
Monday, June 28, 2010
Beef Macaroni Casserole
This is nothing fancy, just a quick, easy, basic recipe to get dinner on the table!
1 lb extra lean ground beef
1 small onion chopped finely
8 oz tomato sauce
1 TB flour
1/2 cup water
s/p
1 cup macaroni noodles, cooked
1 cup shredded cheddar, or whatever you have
Brown the meat & drain off the fat.
Add the onion & saute for a couple of minutes. Then combine the flour & water in a bowl until there are no flour lumps & then add that to the pan. Let simmer about 5 minutes then add the cooked macaroni noodles. Stir it all together & pour into a casserole dish. Sprinkle with cheese & bake for 15 minutes at 400 degrees.
Monday, June 21, 2010
Bran Muffins
1/2 cup raisins
1 egg
3/4 cup milk
1 1/2 cups bran cereal (such as Kellogg's All-Bran® Original Cereal)
1 cup whole wheat flour
1 teaspoon baking soda
1/2 tsp baking powder
1 teaspoon ground cinnamon
2 tablespoons melted butter
1 apple, cored and shredded
1 ripe banana, mashed
1/2 cup honey
Preheat an oven to 400 degrees F (200 degrees C). Grease 12 muffin cups, or line with paper cupcake liners.
Beat the egg with milk in a bowl, and mix in the bran cereal and raisins. Let the mixture stand until the cereal absorbs the liquid, about 5 minutes. Gently mix in the flour, baking soda, cinnamon, melted butter, shredded apple, mashed banana, and honey, and stir a few times to mix.
Spoon the batter into the prepared muffin cups, and bake in the preheated oven for about 20 minutes, or until a toothpick inserted into the center of a muffin comes out clean.
What I did: I doubled the recipe and put them in the freezer. I pull out a couple at a time as needed and microwave them. This recipe is pretty flexible, so use what you have. I don't like raisins, so I used craisins. I used 2 bananas, and no apples. Used some brown sugar instead of honey. I think I also threw in a little plain yogurt. I think I will use honey next time though, b/c they needed some more sweetness - we've been putting honey on them.
Source: original recipe was "Roxie's Bran Muffins" from http://www.allrecipes.com/
Monday, June 14, 2010
Yogurt
Have you ever made your own yogurt? Did you know you could make your own yogurt? I was curious about this b/c my kids like yogurt and its not exactly cheap and they put tons of sugar in it. I researched it a little online and there are tons of websites that will tell you how you can do it. I decided to experiment with the crockpot method b/c it seemed the simplest. It did not turn out perfectly the first time, but not bad. It was just a little runny which may have been my yogurt starter or may have been that it was not warm enough for the "incubating" period. Anyway, if you think I'm crazy and no way are you going to bother making your own yogurt, I understand and I'll see you with my next post. Otherwise, if you are curious or a little interested, read on.
The recipe/method I used came from a site called Nourishing Days. You can click on that link to read her actual post - and many of the comments that followed were helpful. This is basically how it goes:
1. Turn your crockpot on LOW and add 1/2 gallon milk (skim is fine)
2. Heat on LOW for 2 1/2 hours - you are looking for a temperature of 180 degrees before moving on to the next step...
3. Turn off the crockpot and unplug it. Let it cool with the lid on for 3 hours. The temperature you are now looking for is 110-115 before moving on to the next step...
4. Remove 1-2 cups milk and place in a bowl. To this add 1/2 cup plain yogurt w/live active cultures and mix very well (I think this is where I went wrong - I used Dannon, which the ingredients says has live cultures, but I guess not enough. After researching more, there should be a "live active cultures" seal stamped on the container. Stonyfield Farms seems to be a good starter that other people use, so that is what I will try next time.)
5. Pour yogurt/milk mixture back into crockpot and mix thoroughly with a whisk.
6. Put lid back on crock & wrap entire crock in 1-2 thick bath towels.
7. Let culture overnight 8-12 hours (or longer if you want it thicker)
8. Stir and store in containers of your choice. Reserve 1/2 cup to use for your starter for the next batch.
9. Refrigerate at least 8 hours before using.
I stored mine in small 4 or 6 oz containers (can't remember if they are Glad or Ziploc, but you know what I mean). That way the kids could still have their own personal yogurt. This is also where you can experiment with different flavors by adding mix ins. Some suggestions are vanilla extract, jam, powdered drink mixes (Nesquick or Crystal Light, etc), jello powder, pudding mix (this helped make it thicker too). Or just use it plain for smoothies, on top of fruit, with granola or as a substitute for sour cream on tacos, etc.
**After making it a few times now, I have found my kids don't like it unless it's thick like the kind from the store. So I add & whisk in 3/4 cup milk powder in the very beginning with the regular milk.
I'm curious if anyone else has tried this (or if they will try it), so please comment! If you are going to try it I would recommend reading a little more online , but don't overwhelm yourself. This seemed to be the simplest method.
Friday, June 11, 2010
Coconut Tres Leches
I usually don't like this cake b/c often it has a little bit of an eggy taste, but this recipe does not have any eggs in it except in the baked cake. Plus it's coconut - yum!
I must also let you know that this cake is NOT soggy. I promise. When you are pouring your "tres leches" over the cake you will be thinking - "this is going to be so soggy!" and when you take it out of the fridge a couple of hours later and look at it, you are going to think, "this is going to be soggy and gross!" But it won't be. It will be moist, but not soggy at all, and so coconutty & yummy. I must also tell you that it won't be pretty. After you've stabbed it all over and doused it in the milk mixture, it's not pretty. So don't make this for a potluck, you have to plate it up with the whipped cream, toasted coconut and bananas to make it look pretty. I should have taken a picture... the original recipe has some pictures though if you want to see.
Cake: yellow cake, baked in 9x13 pan
Milk Syrup:
1 can (15 ounces) cream of coconut (not coconut milk or coconut water! Check in the Asian or Hispanic food aisles. They didn't have it at my Super Walmart)
1 can (12 ounces) evaporated milk
1 cup heavy whipping cream
1 teaspoon pure vanilla extract
Garnishes:2 medium-size ripe bananas
Sweetened cream (see instructions below)
1 cup sweetened flaked coconut, toasted (bake it at 350 degrees on cookie sheet until golden brown - watch it closely and stir a few times)
In a blender, combine the cream of coconut, evaporated milk, cream, and vanilla and process until smooth.
Pierce the completely cooled cake all over the top with the tines of a fork or a thin wooden skewer. You need LOTS of holes in the cake for the milk to soak in, so poke it ALL over.
Gradually pour the milk mixture over the cake. Let the syrup soak in, then pour on some more until all of it has been used up. When you have finished, not all of the milk will be completely absorbed and might be pooling on the top but that’s ok because it will absorb as it refrigerates. Cover the cake loosely with plastic wrap and refrigerate until all of the milk is absorbed, 2 hours.
Cut the cake and plate it with sliced bananas, whipped cream and toasted coconut, if desired.
Whipped Cream:Pour 1 cup heavy whipping cream into a large (preferably chilled) bowl and beat it on high until thickened 1 ½ minutes. Add ¼ cup confectioners’ sugar and ½ teaspoon pure vanilla extract. Beat on high speed until stiff peaks form, 1 to 2 minutes longer. Makes 2 cups.
Recipe from Mel's Kitchen Cafe
Monday, June 7, 2010
Honey Lime Chicken Enchiladas
6 tablespoons honey
5 tablespoons lime juice (1-2 limes)
1 tablespoons chili powder
1/2 teaspoon garlic powder
1 pound chicken, cooked and shredded
8-10 flour tortillas
1 pound monterey jack cheese, shredded
16 ounces green enchilada sauce
1 cup heavy cream (to lighten them up, I have substituted sour cream with good results)
Mix the first four ingredients and toss with shredded chicken. Let it marinate for at least 1/2 hour (I tossed mine together in a ziploc bag in the morning and let it sit in the refrigerator all day).
Pour about 1/2 cup enchilada sauce on the bottom of a 9X13 baking pan. Fill flour tortillas with chicken and shredded cheese, saving about 1 cup of cheese to sprinkle on top of enchiladas. Mix the remaining enchilada sauce with the cream and leftover marinade. Pour sauce on top of the enchiladas and sprinkle with cheese.
Bake at 350 degrees for 30 minutes until brown and crispy on top.
Source: www.melskitchencafe.com
Monday, May 31, 2010
Chewy Chocolate Cookies
This is a recipe we always had growing up and made often, but I don't know where it originally came from. The cookies are thin and chewy and taste kind of like brownies - just make sure you don't overbake them! The last time I made these, I had some mint chips leftover from the holidays and threw those in. The recipe calls for margarine, which I never buy, but would recommend for this recipe. They do seem to be better with margarine instead of butter.
1 1/4 cups margarine, room temp
2 cups sugar
2 eggs
2 tsp vanilla
2 cups flour
3/4 cup cocoa
1 tsp baking soda
1/2 tsp salt
1 cup chopped nuts (optional)
1. Cream together margarine and sugar. Add eggs and vanilla, mix well.
2. Combine in separate bowl flour, cocoa, baking soda and salt. Add to creamed mixture.
3. Add nuts if desired.
4. Drop by spoonfuls or use a scoop onto ungreased cookie sheet in preheated 350 oven for 8-9 minutes. They will seem like they aren't done, but take them out, you don't want to over bake them. They will continue to cook and flatten out on the pan after you take them out.
Monday, May 24, 2010
Sweet & Sour Meatballs
1 1/2 pounds lean ground beef (you don’t want the beef to be too high in fat because the fat will all pool at the bottom of the baking dish after baking
3/4 cup quick oats
2 eggs, slightly beaten
1/2 cup finely chopped onion
1/2 cup milk
1 teaspoon salt
1/2 teaspoon pepper
1 teaspoon Worcestershire sauce
Combine all of the ingredients and mix well. Form into about 12 balls, each about 2 inches in diameter. Place in a casserole dish. Cover with sauce (below). Bake at 350 degrees for about 30 minutes. Serve over rice.
Sauce:
1/2 cup brown sugar
1/4 cup apple cider vinegar
1 teaspoon mustard
1/4 cup barbeque sauce
1 teaspoon Worcestershire sauce
Combine ingredients and blend thoroughly. Heat in a small saucepan until combined and sugar is dissolved and pour over meatballs. (This dish is not overly abundant on sauce so if you enjoy things a bit saucier, double the sauce ingredients.)
To Freeze: After covering the meatballs with sauce, cover the pan with two layers of aluminum foil and freeze. To bake, preheat the oven to 350 degrees and bake covered without thawing for 1 hour. Uncover and bake 20-30 minutes more, until meatballs are cooked through.
Source: www.melskitchencafe.com
Monday, May 17, 2010
Baked Manicotti
This is kind of a twist on regular manicotti - you roll up lasagna noodles instead of trying to tediously stuff manicotti noodles.
Tomato Sauce
1 28-ounce can diced tomatoes (in juice)
1 28-ounce can crushed tomatoes
2 tablespoons extra-virgin olive oil
3 medium cloves garlic, finely minced
1/2 teaspoon red pepper flakes, optional
1/2 teaspoon salt
2 teaspoons dried basil
Cheese Filling and Pasta
3 cups part-skim ricotta cheese
4 ounces grated Parmesan cheese (about 2 cups)
8 ounces shredded mozzarella cheese (about 2 cups)
2 large eggs , lightly beaten
3/4 teaspoon table salt
1/2 teaspoon ground black pepper
2 tablespoons chopped fresh parsley leaves
2 teaspoons chopped fresh basil
16 no-boil lasagna noodles
Adjust oven rack to middle position and heat oven to 375 degrees.
Heat oil, garlic, and pepper flakes (if using) in large saucepan over medium heat until fragrant but not brown, 1 to 2 minutes. Stir in tomatoes, basil and 1/2 teaspoon salt and simmer until thickened slightly, about 15 minutes.
In a medium bowl, combine ricotta, 1 cup Parmesan chese, mozzarella cheese, eggs, salt, pepper, and herbs; set aside.
To assemble, pour 1 inch boiling water into 13 by 9-inch baking dish, then add noodles one at a time. Let noodles soak until pliable, about 5 minutes, separating noodles with tip of sharp knife to prevent sticking. Remove noodles from water and place in single layer on clean kitchen towels; discard water in baking dish and dry baking dish.
Spread bottom of baking dish evenly with 1 1/2 cups sauce. Using soup spoon, spread 1/4 cup cheese mixture evenly onto bottom three-quarters of each noodle (with short side facing you), leaving top quarter of noodle exposed. Roll into tube shape and arrange in baking dish seam side down. (You should be able to fit 8 manicotti in each row, allowing all 16 to fit in the dish). Top evenly with remaining sauce, making certain that pasta is completely covered.
Cover manicotti with aluminum foil. Bake until bubbling, about 40 minutes, then remove foil.
Sprinkle manicotti evenly with remaining 1 cup Parmesan. Bake until cheese is browned and bubbly, about 6-7 minutes. Remove from oven and let sit for 15 minutes before serving.
The manicotti can be prepared right up until the baking step then covered with a sheet of parchment paper, wrapped in aluminum foil, and refrigerated for up to 3 days or frozen for up to 1 month. (If frozen, thaw the manicotti in the refrigerator for 1 to 2 days.) To bake, remove the parchment, replace the aluminum foil, and increase baking time to 1 to 1 1/4 hours.
What I did: I did make it like the recipe says, but had a hard time with soaking the noodles. Next time I will just boil the noodles, but not completely cook them. Just enough that they are pliable though b/c they will continue to cook in the oven and I do not like mushy noodles.
Source: www.melskitchencafe.com
Tuesday, May 11, 2010
Meal Planning Services
I'm wondering if anyone has ever used one of the many online menu planning services. I have looked at them in the past and thought they were too expensive to be worth it and that judging by their sample menus, we might not like the meals they plan for you. They seemed to include a lot of soup, for example, and my husband does not believe soup is a meal.
One of the blogs I subscribe to, Money Saving Mom, had a post today on one of these services. This one is E-Mealz and is very inexpensive and does not have soup on any of the sample menus I looked at. You can also cancel at any time. I'm considering trying it for a coupld of reasons. Lately I feel like I make meals that are too complicated or "fancy." We've been trying to cut our grocery budget and I feel like making simpler meals would help with that as well as actually being easier and faster to prepare. "30-minute meals" always take me longer than 30 minutes! So I have been keeping my eye out for simple, more basic meals. The recipes here seem to be very simple and quick - they can type the instructions in one little box on their meal planning sheet...
I don't think this particular service will really cut my grocery budget though. They claim to keep it around $75/week for their meals. But by the time I add in breakfast & lunch groceries, milk, etc. I don't think my total will be much different. So I wouldn't be trying it for that reason. I think I would try it b/c I have 2 kids and a newborn and don't want to have to plan meals right now! And because I want some new simple & quick recipes. And then I would probably cancel it after a few months.
What do you think? Have you tried this or other menu/meal planning services?
Monday, May 10, 2010
Creamy Lemon Crumb Squares

If you like traditional lemon squares, you will like these. I like lemon squares - sometimes. I do not like things that taste eggy, which most of the time lemon squares do. When I saw this and saw that there were no eggs, I had to try it b/c it's so rare to find a lemon square that is not eggy! And this has a crumb topping, so it's even better! It is also very easy to make.
Ingredients
1-⅓ cup All-purpose Flour
½ teaspoons Salt
1 teaspoon Baking Powder
1 stick (1/2 Cup) Butter, Slightly Softened
1 cup Brown Sugar (lightly Packed)
1 cup Oats
1 can (14 Ounce) Sweetened Condensed Milk
½ cups Lemon Juice
Zest Of 1 Lemon
1-⅓ cup All-purpose Flour
½ teaspoons Salt
1 teaspoon Baking Powder
1 stick (1/2 Cup) Butter, Slightly Softened
1 cup Brown Sugar (lightly Packed)
1 cup Oats
1 can (14 Ounce) Sweetened Condensed Milk
½ cups Lemon Juice
Zest Of 1 Lemon
1. Preheat oven to 350
2. Mix butter and brown sugar until well combined.
3. Sift together flour, salt, and baking powder.
4. Add oats and flour to butter/sugar mixture and mix to combine.
5. Press half of crumb mixture into the bottom of an 8 x 11 inch pan. (you can use a 9x13, but your layers will be pretty thin. I used an oval shaped, shallow casserole.)
5. Mix together condensed milk, lemon juice, and lemon zest. Spread onto the bottom layer of the crumb mixture. Top with the other half of the crumb mixture, but don’t press.
6. Bake for 20 to 25 minutes, or until golden brown.
7. Allow pan to sit on counter for 30 minutes after baking. Cut into squares and refrigerate for a couple of hours or until cool.
Serve cool.
Source: The Pioneer Woman
Monday, May 3, 2010
BBQ Chicken Pasta
1 tablespoon extra-virgin olive oil
2 boneless skinless chicken breasts, cut into bite-size chunks
1 red onion, diced
3 cups water
2 1/2 cups chicken broth
1/2 teaspoon salt
12 ounces penne pasta
2/3 cup barbecue sauce
1/3 cup sour cream
1/2 cup shredded mozzarella cheese
1/2 cup shredded sharp cheddar cheese
1. In a large 12-inch nonstick skillet heat the olive oil over medium heat (you could also use a large pot if you don’t have a skillet this big). When hot, add the chicken and onions and saute, stirring occasionally, until the chicken is browned and cooked through. Remove the chicken and onions to a plate and set aside.
2. In the same skillet, add the water, chicken broth, penne and salt. Bring to a boil and simmer for 12 to 15 minutes, until the liquid is almost absorbed, the pasta is tender and the mixture is thick and syrupy. Stir in the barbecue sauce and sour cream. Once mixed, add in the reserved chicken, onions and shredded cheese. Stir to combine and cook until everything is heated through.
Serve immediately and garnish with additional red or green onions and shredded cheese.
Recipe Source: My Kitchen Cafe
Monday, April 26, 2010
Teriyaki Chicken Legs
8 chicken legs/drumsticks
1 1/2 cups (12 oz) teriyaki sauce
pepper
3 TB sesame seeds
1 cup chicken stock
3/4 cup water
vegetable oil
1 cup rice
1 bunch broccoli, trimmed and cut into pieces
salt
1/2 red bell pepper, thinly sliced
1 bunch scallions, chopped
2 cloves garlic, minced
1 inch ginger, grated or minced (I used about 1-2 tsp ground ginger)
1. Place chicken in resealable bag with teriyaki sauce & let marinate 4 hours or overnight.
2. preheat oven to 400
3. Place a cooling rack over a baking sheet (you may want to line your baking sheet with foil for easier cleanup). Arrange chicken on cooling rack. Season liberally with pepper.
4. Cover with foil and roast 20 minutes. Turn legs and roast 10 minutes more. Remove foil and roast 5-8 more to darken & crisp. Sprinkle with sesame seeds.
5. While chicken cooks, cook the rice in the stock with 1 TB veg oil, simmering covered about 18 minutes. Fluff with fork.
6. Original recipe suggested to blanch the broccoli, so you can if you want, but I like mine crisp.
7. Heat 2 TB oil in large skillet, add broccoli and cook about 5 min then add red pepper and scallions. Stir fry a minute or two then add garlic & ginger, cooking 1 minute more.
Serve chicken legs with rice & stir fry
Original recipe: www.rachaelrayshow.com/food/recipes
Monday, April 19, 2010
Chewy Chocolate Chip Cookies
Everyone has their favorite, stand-by chocolate chip cookie recipe. I like chewy cookies, not crunchy and this is my new favorite recipe. Yes, it's shortening instead of butter, but it's so good and freezes really well and stays chewy after freezing/thawing.
1. Cream together:
1 cup shortening (I used butter flavored)
1 cup sugar
1 cup brown sugar
2. Add 3 extra large eggs and mix for 5-7 min (if you dont have XL eggs beat a 4th large egg in a separate bowl and add about half of it to the mix. and yes 5-7 minutes! just set a timer)
3. Add & mix in 1 TB hot water
4. Add & mix in:
1 1/2 tsp salt
1 1/2 tsp vanilla
1 1/2 tsp baking soda
5. Add & mix just until combined:
3 1/2 cups flour
chocolate chips
Bake in preheated 350 degreee oven for 10-11 minutes until barely browned on the edges. Don't overbake! They won't be chewy if you overbake them and the chewiness of these is what makes them so good!
Source: http://www.melskitchencafe.com/ Aunt Alecia's Chocolate Chip Cookies
Monday, April 12, 2010
Baked Greek Chicken
1 whole broiler/fryer chicken about 5 lbs (I just bought one in a pkg already cut up)
3/4 tsp salt
2 lemons
3 cloves minced garlic
1 TB fresh oregano (I used dried)
pepper
olive oil
1 fennel bulb, trimmed, cored & sliced (no fennel at my store! I used a couple stalks of celery)
1 cup dry orzo
1/3 cup pitted kalamata olives, halved
1/3 cup crumbled feta cheese
1. Preheat oven to 425. Pat chicken dry. Loosen skin & sprinkle some salt under skin.
2. Grate zest of 1 lemon, then cut lemon in half and juice. In small bowl stir together 2 tsp of zest, 2 TB of the lemon juice and 1/2 tsp salt, the garlic, oregano & pepper. Tuck half of this mixture under skin of chicken.
3. Cut the peel off the 2nd lemon and chop the fruit into pieces.
4. Add 1 TB olive oil to remaining herb mixture in bowl. Toss with sliced fennel and chopped lemon. Transfer to large baking dish and top with chicken pieces. Bake at 425 for 40 min. or until chicken is done.
5. Meanwhile, cook orzo according to pkg. Drain & transfer to bowl.
6. When chicken is done transfer the pieces to a platter. Spoon the fennel into the bowl with the cooked orzo along with 1 TB of pan drippings, the olives and feta. Stir to combine and serve alongside the chicken.
Source: Family Circle magazine, March 2010 page 181
Wednesday, April 7, 2010
BBQ Chicken Braid
Don't let all the dough rising and braiding scare you! This isn't hard and it's so yummy!
*Note: the amounts of chicken, onions, barbecue sauce, and cheese in the recipe can be altered based on your preference – simply add more or less to your liking.
*Makes 2 large braids
1 recipe French Bread Rolls
2 cups shredded, cooked chicken
1 red onion, sliced into thin half moons
1 1/2 cups barbecue sauce
1 cup shredded mozzarella cheese
1 cup shredded sharp cheddar cheese
Preheat the oven to 400 degrees.
After the french bread roll recipe has gone through the first rise, split the dough into two parts. Lightly cover one portion and set aside. Roll the other portion into about an 11X17-inch rectangle (I roll mine out directly on a silpat liner to make for easy transfer to the baking sheet and oven). Using a pizza cutter or knife, cut 1-inch wide strips in towards the center, starting on the long sides. There should be a solid strip about 3 inches wide down the center, with the cut strips forming a fringe down each side.
Spread half of the barbecue sauce down the center strip. Top with the chicken, onions and cheese. Fold the side strips over filling, alternating strips from each side and pressing them into the dough on the opposite side, forming a braid. Pinch or twist to seal.
Place the braid on a lined baking sheet (or simply transfer the silpat liner to a baking sheet) and let rest for 15 minutes. While it is resting, follow the same steps above for the second portion of dough.
Bake the first braid for 15-20 minutes (while the second braid is resting), until golden brown and bread is baked through. Remove from oven and bake the second braid.
Let the braids rest for 5 minutes. Using a serrated knife, cut braid into sections and serve warm.
Braid How-To With one half of the french bread roll recipe, flatten or roll the dough out to about 11X17 inches. I roll it out directly on my silpat baking mat for easy measuring and then transferring to a rimmed baking sheet. If you don’t have a silpat liner, use parchment paper or press the dough directly onto a lightly greased rimmed baking sheet.
After the dough is rolled out, start cutting strips along each side, leaving a wide strip, about 3-inches across, in the middle. I use my pizza cutter to speed through this step.
 After the strips have been cut, layer all of the ingredients down the center strip and start braiding by folding alternate strips across and pressing them down to stick.
 As you get to the end, you’ll likely be wondering how to finish this whole thing up.
Keep braiding like normal until you have two final strips extending one from each side.
Fold one side over and press it into the other strip.Grab the final extending strip and bring it over to lay across the bottom of the braid and gently press it into the dough on the other side. It won’t look perfect, but that’s ok. Then, using your fingers, pinch the dough together to seal the long seam at the bottom of the braid and any other small seams you may see. It may look a bit lumpy but I promise you won’t care once it is baked to golden perfection.Finally, pick up the silpat or parchment paper and transfer it to the baking sheet. Ready to bake!
What I did: Two braids was plenty for my family! (2 adults & 2 toddlers) Although, I was suprised that it reheated well in the oven the next day- I was afraid the bread would be soggy. But if you also have a small family, maybe make 1 braid and then make the rest of the dough into rolls then bake them and freeze them for another day.
Source (including photos): www.melskitchencafe.com
Friday, April 2, 2010
French Bread Rolls
This is not my favorite roll recipe, BUT it is very simple and seems to be pretty foolproof, so it would be good practice if you haven't made bread or rolls very much. It's also great b/c there are no eggs, milk, or honey - so you can have fresh rolls even when you are out of those things or are allergic to them.
My next post is going to be a recipe that uses this dough also.
French Bread Rolls
adapted from allrecipes.com
*Makes about one dozen rolls
1 1/2 cups warm water (110 degrees F/45 degrees C)
1 tablespoon active dry yeast
2 tablespoons white sugar
2 tablespoons vegetable oil
1 teaspoon salt
4 cups all-purpose flour
In a large bowl, stir together warm water, yeast, and sugar. Let stand until creamy, about 10 minutes.
To the yeast mixture, add the oil, salt, and 2 cups flour. Stir in the remaining flour, 1/2 cup at a time, until the dough has pulled away from the sides of the bowl. Turn out onto a lightly floured surface, and knead until smooth and elastic, about 8 minutes. Lightly oil a large bowl, place the dough in the bowl, and turn to coat. Cover with a damp cloth, and let rise in a warm place until doubled in volume, about 1 hour.
Deflate the dough, and turn it out onto a lightly floured surface. Divide the dough into 12-14 equal pieces, and form into round balls. Place on lightly greased baking sheets at least 2 inches apart. Cover the rolls with a damp cloth (or greased saran wrap), and let rise until doubled in volume, about 40 minutes. Meanwhile, preheat oven to 400 degrees F (200 degrees C).
Bake for 12-13 minutes in the preheated oven, or until golden brown.
*Can freeze the rolls after baking – microwave on high for 2 minutes before serving.
What I did: I used about 1/2 whole wheat flour and half white flour. This makes 12 very large rolls - like for sandwiches. So if you want them more for dinner rolls, just make them smaller - maybe 18 rolls instead of 12?
Source: www.melskitchencafe.com
Wednesday, March 31, 2010
Recipes to Come!
Sorry I have been so MIA lately and have not been posting! I am having a baby on Friday and don't want to abandon you another several weeks w/o recipes while I settle in and adjust to another baby and probably won't be cooking much. I have a bunch of recipes I am typing up today and will schedule to post periodically over the next several weeks, so keep checking back or add me to your Google Reader, there are recipes coming!
Sunday, February 28, 2010
Sweet Success
People seem to think that since I majored in culinary arts in college and enjoy cooking and still regularly cook, that we always have wonderful fabulous dinners. We don't. That's why I don't have a post every day! Unfortunately not all of the meals I plan, shop for and prepare are wonderful. Some turn out fine, but just aren't that great. Others sound good and should be good, but I mess up and have disasters once in a while too!
I used to make homemade pizza a lot, but hadn't made it in a while, so I thought I'd try it again with a new recipe. I also thought I would try and use my neglected pizza stone. So I made the dough and preheated my pizza stone. I even made the sauce grated the cheese myself. I stretched out my dough on a board with cornmeal underneath so it wouldn't stick and was ready to slide it into the super hot oven onto the pizza stone. Well it stuck. So all the dough, sauce and cheese mushed into a pile half on the pizza stone and quite a bit on the bottom of my 500 degree oven. Not success!
As the smoke detectors went off all over the house and my children covered their ears in fear, I fanned out the smoke and tried again. Luckily the dough was enough for 2 pizzas and luckily the 2nd one did not stick (but tasted a little smoky). My husband came home later and didn't even recognize the pizza had been made from scratch. He thought it was the kind from the grocery store wrapped in the plastic... But that's alright, I will try it again another week!
Tuesday, February 23, 2010
Bean Burritos
This makes almost 20 burritos - so you will have some to freeze for lunches or snacks or whatever. Way healthier than the frozen ones from the store!
1 cup brown or white rice (or 2 cups already cooked rice)
2 tablespoons olive oil
1 medium onion, diced
3 cloves garlic, finely minced
1 jalapeno, seeds and membrane removed, finely diced (can substitute 1 can of green chiles)
1 teaspoon cumin
Salt and pepper to taste
3 tablespoons tomato paste
2 cans (15 oz. each) pinto beans, drained and rinsed
1 1/2 cups water
1 (10 oz) package frozen corn or 1 can whole kernel corn, drained
6 green onions, white and green parts finely chopped
1/2 teaspoon garlic powder
1/2 teaspoon onion powder
16 burrito-sized (10-inch) flour tortillas
2 cups shredded Monterey Jack cheese
1. Cook rice; set aside. Meanwhile, heat oil in large saucepan over medium heat. Add onion, garlic, jalapeno and cumin; season with salt and pepper. Cook, stirring occasionally, until onions are softened and golden, being careful not to let the garlic burn.
2. Add tomato paste and cook, stirring for 1 minute.Add one can of beans and mash gently in the pan (a potato masher or fork works great here). Add the second can of beans and the water and stir to combine. Bring to a boil, reduce heat to medium and simmer, stirring occasionally, until thickened, 10-12 minutes, being careful not to let the mixture stick to the bottom of the pot.
3. Add corn; cook to heat through, 2-3 minutes. Stir in onion and garlic powders. Remove from heat; stir in green onions and cooked rice.
4. Heat tortillas in microwave for about 30-45 seconds or until all are warmed through.Fill each tortilla with about 2/3 cup bean and rice mixture and 1/4 cup cheese on one side of tortilla. Fold, and hold in sides. Starting from filled end, holding sides in as you work, tightly roll into a bundle. Place on a baking sheet, seam side down, and prepare remaining burritos.
5. Serve warm immediately, with salsa and sour cream if desired -- or, to freeze for later consumption, put the baking sheet of burritos into the freezer for at least 30 minutes, or until very cold so that they don't come apart in the wrapping process. Remove them from the freezer and wrap each burrito individually in plastic wrap and place all the wrapped burritos in a freezer-safe resealable bag and freeze up to three months.
To reheat from frozen:Remove plastic wrap from the burrito. Poke holes in the top several times with a fork. Microwave on high for two minutes. Gently poke a few more holes in the burrito and microwave for another minute. Be careful as the burrito will be piping hot!
What I did: First of all, I used whole wheat tortillas. These usually are not as good as white ones, but at Sam's they sell some really good ones in a large package that is perfect for this recipe. They are Santa Fe Tortilla Company and they are whole wheat, but they are still soft and chewy like a white tortilla and pliable enought that I didn't have to preheat them for wrapping. So I recommend those if you can find them. 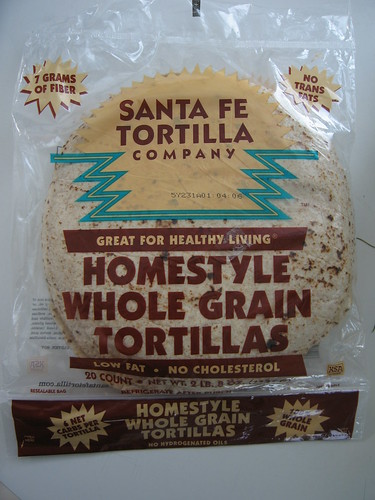
We had them for dinner and each made our own burritos with lettuce, sour cream, tomatoes, cilantro, hot sauce, whatever you want. Then I wrapped the leftovers with just the bean mixture and cheese and wrapped them up in plastic right away instead of putting them in the freezer for a while.
My husband was a little skeptical, but they do reheat really well and put a little sour cream & salsa on the side. I think next time I will definitely add a can of green chiles though.
Original recipe: www.mykitchencafe.blogspot.com
Sunday, February 21, 2010
Oatmeal Pancake Mix
My kids always want pancakes, but pancake mix is expensive for a little box and not very healthy. You can buy whole wheat mixes, but they cost even more. I've tried home-made mixes before and not been all that impressed, but this one is good and healthy (and is a great way to rotate through your food storage if you have it). My husband likes it better than Krusteaz, so I think that says a lot!
You do have to keep it in the fridge or freezer though b/c it has oil in it and to keep the nutritional value of the wheat flour if you are grinding it yourself.
*Makes 10 cups of dry mix
3 1/2 cups rolled (quick) oats
3 cups whole wheat flour
2 cups all-purpose flour
3 tablespoons sugar
3 tablespoons baking powder
1 tablespoon salt
1 tablespoon baking soda
1 cup vegetable oil
Mix all the dry ingredients together in a mixer with a paddle (or by hand). With mixer on slow speed (or gently by hand), drizzle the vegetable oil into the bowl slowly while the mixer is running. When all the oil has been added, stop the mixer and squeeze a clump of mix in your hand. If it stays together, it is just right. If it is still crumbly, add another tablespoon of oil at a time until the consistency is correct (I've never had to add additional oil).
Store in an airtight container for up to two weeks at room temperature or indefinitely in the refrigerator or freezer.
To make the pancakes: whisk together 1 cup of mix, 1 cup buttermilk (a combination of half plain yogurt and half milk will also work), and 1 egg. The mixture may seem thin at first but the oats will soak up the milk as it stands while the griddle preheats.
Heat a griddle and drop the batter onto it. When the edges look dry and bubbles come to the surface and don't break, turn the pancake over to finish cooking on the second side. As a sidenote, buttermilk can be frozen indefinitely for future batches of pancakes, so it's worth keeping it around!*
1 cup of mix will make about 6-7 4-inch pancakes.
What I do: Another way to make buttermilk is to put about 1 1/2 tsp of white or cider vinegar in a 1 cup measure, then fill it up with milk. Let it sit a couple of minutes and it'll be ready. I also always end up adding more than 1 cup mix (an extra 1/4 - 1/2 cup), otherwise its a bit too runny even if you give the oats time to soak up some of the liquid like she says.
Original recipe from www.mykitchencafe.blogspot.com (can you tell this is my new favorite food blog??)
Friday, February 19, 2010
Kalua Pork
This is super easy and smelled so good cooking all day that I was pretty much counting down the hours till it was done.
10-12 pounds pork shoulder butt roast (don't substitute a leaner cut of pork or it will be dry)
1 bottle liquid smoke (4oz)
2 tablespoons sea salt (or hula salt if you can find it)
1 1/2 cups water
Preheat oven to 375 degrees.
Trim roast of large pockets of fat (but leave some fat on there to help the pork stay tender while cooking). Place pork in large roasting pan (the aluminum, deep roasting pans you can buy at the grocery store work great if you don't own a heavy-duty roasting pan).
Rub 2-3 tablespoons of sea salt into pork. Pour the bottle of liquid smoke over and around the pork. Pour the water around the pork.
Cover roasting pan TIGHTLY with two layers of aluminum foil.Bake for 5-7 hours (don't uncover while baking - let the steam and heat work it's magic!).
Shred with two forks and serve with rice.
What I did: I used a 4 lb roast and still had tons left over for freezing. I got a covered stoneware baker for Christmas so I cooked it in there. I used the stoneware lid, but still covered the seal with foil, just to be sure the steam stayed inside since that is the key to cooking this. Since my roast was smaller, I used only 3/4 cup water but I still ended up using almost the whole bottle of liquid smoke, and I cooked it at 325 for 5 hours instead of at 375. The recipe is going to be really forgiving, so don't stress about it too much if your roast is a different size. You could cook in in a crockpot too. I served it on rice with fresh pineapple on the side. My husband ate it on a sandwich with bbq sauce and took leftovers to work for lunch in a tortilla. Leftovers will freeze well for use later in pork tacos, sandwiches, enchiladas, whatever you like.
Original recipe: http://www.mykitchencafe.blogspot.com/search?q=kalua+pork
Friday, February 12, 2010
Easiest Dinner Ever.
This is so easy. You don't have defrost anything, chop anything, saute anything or even stir anything to get it going.
2 cups frozen corn
2 frozen, boneless skinless chicken breasts
1 can black beans, drained & rinsed
1 1/2 cups salsa
Layer ingredients in lightly greased slow cooker in order listed. Cook on low 6 hours. Take chicken out & shred it. Return to slow cooker & stir. Serve taco salad style on tortilla chips with lettuce, cheese, sour cream, cilantro, chopped tomatoes, green onions, whatever you feel like. Or serve on a taco shell or in a burrito.
from: www.mykitchencafe.blogspot.com
Saturday, January 23, 2010
Mac n' Jack Salad
1 lb elbow macaroni
10 oz frozen corn, defrosted
1 red bell pepper, seeded & chopped
1 red onion, chopped
4 celery ribs, chopped
1 - 8 oz brick pepper jack cheese, diced
s/p
3 TB red wine vinegar
1/3 cup olive oil
1 1/2 cups tomatillo salsa (salsa verde) or chipotle salsa
chopped cilantro or parsley
1. Cook pasta until al dente. Drain & rinse with cold water to cool it down. Drain well.
2. While pasta cooks combine corn, red pepper, onion and celery in large bowl with cheese. Season with s/p.
3. Add cooled pasta to vegetable mixture.
4. Whisk together vinegar and oil. Stir in salsa. Pour over pasta & vegetables. Toss to coat evenly. Garnish with cilantro
This makes a lot and I think it was too much pasta, so unless you are making it for a large crowd or potluck or something, just use 1/2 lb or 3/4 lb of pasta. I also only used half a red onion and cut back the oil. Not a bad idea to make ahead and let it chill in the fridge.
Source: Rachael Ray's Book of 10, page 40
Thursday, January 21, 2010
Ooey Gooey Crunchy Chewy Brownies

These brownies don't seem to have an official name, but the title describes them well I think. I found them on some old friends' new food blog and put off making them as long as I could, but eventually I caved. I love anything with marshmallows!
1 box brownie mix
1 Tablespoon butter
1 cup chocolate chips
1 cup peanut butter
3 cups rice krispies
1- 10 oz bag of mini marshmallows
Directions:1. Prepare brownies as directed on box.
2. When brownies are done, spread marshmallows evenly on top of brownies. Put back in oven for 3 minutes.
3. While brownies are in the oven, begin melting the butter, chocolate, and peanut butter in pan over low heat. Once this mixture is melted, stir in the rice krispies.
4. After the marshmallows have been in the oven for 3 minutes, take the pan out of the oven and spread the melted chocolate mixture on top of the marshmallows.
5. Cool in the refrigerator for about 45-60 minutes.
Source: http://www.ftko.blogspot.com/
Tuesday, January 19, 2010
Smoked Paprika Chicken with Egg Noodles
8 oz extra wide egg noodles
2 TB olive oil
1 1/2 lbs chicken, cut in bite-sized pieces
1 medium onion, chopped
2 garlic cloves, chopped
1 1/2 tsp smoked sweet paprika (I used regular paprika)
pepper
1/2 cup chicken stock
1 TB butter
1/2 cup sour cream or lite sour cream
1/4 cup fresh parsley, chopped (I used dried)
1. Begin cooking the noodles in salted boiling water until tender, but with a little bite left to them.
2. Heat oil in skillet, add chicken. Lightly brown on all sides. Add onions and garlic and cook a few minutes more. Add paprika then season with s/p. Stir in chicken stock and reduce heat to low.
3. Stir in sour cream then remove from heat. When noodles are done, drain them and return them to the warm pot. Add butter and toss to coat. Add half the parsley. Serve noodles with chicken and sauce on top. Garnish with remaining parsley.
Source: Rachael Ray's Book of 10 page 72
Sunday, January 17, 2010
Enchilada Suizas and Green Rice

This is a little bit of work, but really good! And don't let all the peppers scare you if you don't like spicy food, just make sure you take all the seeds & ribs out and it will just be a mild spice.
ENCHILADAS:
2 large poblano peppers
4 pieces boneless, skinless chicken breast, cooked & shredded
2 TB olive oil
1 onion, chopped
2 cloves garlic, chopped
s/p
8 tomatillos peeled, rinsed, chopped
1/4 cup cilantro
juice of 1 lime
2 tsp honey
8 6-inch flour tortillas
1 cup sour cream
1 cup shredded Swiss cheese
1 cup shredded monterey jack cheese
1. Heat broiler to high. Place poblanos under broiler and char until blackened on all sides, 10-12 minutes. Leave oven door cracked to allow steam to escape. Place peppers in a bowl and cover tightly with plastic wrap. Allow to cool to handle, then peel off the charred skin. Chop off the top, slice open and remove seeds. Then coarsely chop what's left.
2. Place tomatillos, cilantro, lime juice and poblanos in food processor. Process about 1 minute until almost smooth.
3. Heat oil in skillet. Add onions, jalapeno and garlic. Cook to soften about 5 minutes. Add smooth mixture from food processor. Stir to combine. Add honey, season with s/p and simmer 10 minutes.
4. Pour a little sauce into the bottom of medium baking dish. Fill tortillas with shredded chicken, roll u and place in baking pan side-by-side. Top with remaining sauce. Dot with sour cream and top with Swiss and jack cheeses. Bake 25-30 minutes at 375 until bubbly and brown on top.
RICE:
Bring 1 1/2 cups chicken stock and 1 TB butter to a boil. Stir in 1 cup white rice, cover and simmer 15 minutes. While rice is cooking, in food processor process about 1/4 cup chicken stock, 1 cup spinach leaves, 1/2 cup cilantro, 1 jalapeno seeded & roughly chopped, and 3-4 scallions roughly chopped. Process until a thick paste.
After rice has cooked about 15 minutes, stir in spinach mixture, cover and cook 2-3 minutes more. Turn off the heat and let stand 5 minutes.
**I made the rice w/o the spinach since I didn't have any, and I also left out the butter & it was still good
**I keep shredded chicken in the freezer in bags containing 2 cups of shredded chicken. This only got me 6 enchiladas - so you will need 3 or 4 cups of shredded chicken if you want to get 8 enchiladas
Source: from Rachael Ray Show, December 17, 2009
Friday, January 15, 2010
Zesty Ravioli Skillet
1/3 cup whipping cream
4 cups fresh baby spinach leaves
6 oz provolone cheese, grated
1 TB olive oil
1 small jalapeno, seeded & chopped (optional)
3 garlic cloves, pressed
2 cans diced tomatoes with onions, undrained
1/2 tsp salt
pepper
24 oz package frozen cheese ravioli, thawed
halved grape tomatoes (optional)
1. Heat oil in skillet, add jalapeno and cook about 1 minute. Add garlic and cook until fragrant.
2. add tomatoes, salt & pepper and heat to a simmer. Add ravioli and cook 4-5 minutes or until tender. Stir in the cream and cook again until simmering.
3. Sprinkle spinach over ravioli and cook, covered, 1 minute or until spinach is wilted.
4. Remove from heat, top with cheese, cover and let stand until cheese is melted. Garnish with grape tomatoes if desired.
This is a Pampered Chef recipe we made at a Pampered Chef party.
Wednesday, January 13, 2010
Skillet Chili Mac with Corn and Green Chiles

Don't let the title scare you away! It sounds a bit Hamburger Helper-ish, but this is waaay better!
1 TB veg oil
1 lb ground beef
1 onion, minced
3/4 TB chili powder
1/2 TB ground coriander (or ground cumin)
1/2 tsp salt
3 garlic cloves, minced
1 TB brown sugar
2 8oz cans tomato sauce
2 cups water
2 cups elbow macaroni
1 cup frozen corn
1 4.5 oz can chopped green chiles
fresh cilantro, chopped
2 cups shredded cheese (cheddar jack or mexican blend, whatever)
1. Heat oil in large non-stick skillet over med heat. Add ground beef, onion, chili powder, coriander or cumin, and salt. Cook until ground beef is no longer pink. Drain off grease.
2. Stir in garlic and brown sugar and cook until fragrant, about 30 seconds. Stir in tomato sauce, water and macaroni. Cover and cook, stirring often and keeping at a steady simmer until macaroni is tender, about 10-12 minutes.
3. Stir in 1 cup of the cheese, frozen corn, green chiles and cilantro. Sprinkle remaining 1 cup of cheese over the top. Cover and let sit off the heat until the cheese melts.
So yummy!
Monday, January 11, 2010
Tortellini Spinach Soup
Heat 6-8 cups of a tomato-based vegetable soup in a large saucepan. Add about 2 cups spinach & cheese tortellini and 4 cups chopped baby spinach. Top with parmesan.
Source: Parenting magazine, October 2009, p. 67 (you'd think I could have thought of this myself)
Source: Parenting magazine, October 2009, p. 67 (you'd think I could have thought of this myself)
Saturday, January 9, 2010
Open-faced Chicken Parm Sandwich
Slice a loaf of whole grain Italian bread in half, then in half lengthwise. Lay 4 pieces of cooked chicken breast on the 4 slices of bread and top with baby spinach leaves. Pour some jarred marinara on top, then sprinkle with mozzarella and parmesan. Broil until cheese is bubbly.
Source: Parenting magazine, October 2009, p. 67
Source: Parenting magazine, October 2009, p. 67
Thursday, January 7, 2010
Chicken and Corn-Tomato Salad
I chose to make this recipe b/c it sounded healthy and advertised that it was "ready in minutes." I didn't expect much, but we really liked it!
1 1/4 lb boneless skinless chicken breasts
sliced scallions
minced garlic
2 pints halved cherry tomatoes
2 cups corn kernels
lime juice
cilantro
avocado wedges
1. Cook the chicken breasts in a large skillet. (I cut mine into bite-sized pieces instead of leaving whole).
2. Remove the chicken then add sliced scallions and minced garlic, stirring about a minute. Add 2 pints cherry tomatoes and corn kernels and cook a few more minutes. Season with S/P.
3. Serve the chicken on top of the salad with a squeeze of lime, cilantro and avocado wedges.
This was good, but not as quick as I imagined. I did not cook the cherry tomatoes, I just stirred them in at the end b/c I prefer them not to be mushy. Justin added some hot sauce and I served them with potato pancakes made from leftover funeral potatoes (yeah, as if funeral potatoes were not unhealthy enough I added eggs and pan fried them...)
Source: Parenting Magazine, October 2009, p.67
Subscribe to:
Posts (Atom)